CarboXtrem TT Aerobars
€890,00
CARBOXTREM
Pre-launches, custom-fit tips and offers for your bike. No spam: only what is worth it.
Already have an account? Sign in26/07/2026 · Alfonso Lopez Pe

A carbon handlebar is engineered to take whatever you throw at it: an out-of-the-saddle sprint pulling on both sides, an emergency stop, the weight of your whole upper body resting on it for six hours in the saddle. Yet many carbon parts that end up in the bin did not fail on a pothole or in a crash.
They failed on the workstand, with an Allen key in someone's hand.
It is not bad luck or poor quality: it is a misunderstanding of how the material works. This article explains what really happens inside a bolted carbon joint, why tightening more is almost never the answer and how to mount a cockpit step by step without taking chances.
An aluminium part behaves more or less the same whichever way you push it. Carbon does not. It is a composite of oriented fibres inside a resin, and its strength depends on the direction those fibres are working in. A handlebar tube is laid up to resist bending and torsion, that is, for you to pull on it upwards and sideways. That makes it extraordinarily efficient, and it also explains why the same tube is far more vulnerable to a load nobody designed it for: being crushed from the outside.
If you are interested in the background on the material, we cover it in our guide on what the T700, T800 and T1000 grades mean: the fibre grade matters, but the orientation of the plies matters as much or more.
When you tighten a stem clamp, you are not "holding" the handlebar: you are squeezing it. A carbon tube is hollow, and what that area bears is a crushing load over a very small surface. If the force is as intended, the clamp spreads it and nothing happens. If you go half a turn too far, two problems appear:
Add a sharp edge, a burr or a grain of sand trapped under the clamp and you have a perfect stress concentrator. That is where cracks are born.

This is the change of mindset that prevents 90% of disasters. In a bolted joint, what stops the part from rotating or slipping is not the bolt acting as a stop: it is the friction between the two surfaces in contact. The bolt only generates the force that keeps them pressed against each other.
The consequence is straightforward: if you increase friction, you need less force to hold the same thing. And less force means less pressure on the carbon.
Carbon assembly paste is a compound with hard microparticles in suspension. When you apply it to the interface between the handlebar and the clamp, those particles bite into both surfaces and multiply the grip. Result: the part stops slipping at a clearly lower torque than you would need dry.
It is applied in a thin layer on the contact area, and it does not replace anything: it is not a glue or a threadlocker. It is, literally, sandpaper in cream form.
It is the most common garage mistake: greasing the clamp "so it doesn't creak". Grease does exactly the opposite of what you need, because it reduces friction. With a lubricated surface the part moves more easily, so instinct calls for another turn of the key, and another, until the handlebar stops rotating… because it is crushed.
Simple rule: grease on the bolt threads if the manufacturer says so, never on the carbon interface.
It is the cheapest tool in the workshop compared with what it costs to replace a cockpit. And it is the only way to know whether you are applying 5 Nm or 9 Nm, because the human wrist cannot tell the difference: workshop tests show it again and again, and anyone who has measured their own tightening "by feel" has had a surprise.
In cycling, almost everything that matters lives at low values. Manufacturers usually specify single-digit figures for handlebar, stem and seatpost clamps, and those numbers are printed on the part itself or in its manual. That figure is not estimated or copied from another brand: it is read. A low-range wrench (roughly 2 to 15 Nm) covers 95% of the tightening on a modern bike.
An example from our own range: our Top Headset Cap for the Gemini handlebar is designed to allow direct tightening of the headset star nut, with a specified torque of up to 5 Nm. It is a published value, not an estimate, and that is how it should always be.

| Mistake | What happens to the part | What to do instead |
|---|---|---|
| Tightening "by feel" with a long Allen key | It is easy to double the recommended torque without noticing | Low-range torque wrench |
| Greasing the carbon interface | Less friction, the part rotates, you end up overtightening | Thin layer of assembly paste |
| Tightening one bolt fully and then the other | Uneven load and local deformation of the tube | Crosswise, progressive tightening |
| Mounting with sand or debris in the clamp | Pressure concentrated in one spot: where cracks start | Degrease and clean before mounting |
| Ignoring burrs on the clamp | Localised cut across the fibres | Check and smooth sharp edges |
| Retightening every time it creaks | Usually a sign of dirt or missing paste, not missing torque | Remove, clean and remount properly |
Carbon warns you differently from metal, which bends before it breaks. Signs that call for a serious inspection:
If you see any of these signs, the sensible thing is not to ride on that part until someone has checked it. A compromised handlebar doesn't fail in your garage: it fails under braking on a descent.
All of the above leads to a design conclusion that is sometimes overlooked: every bolted joint is a place where someone can make a mistake. A conventional cockpit has the joint between handlebar and stem, with its four faceplate bolts, plus the clamp on the steerer tube.
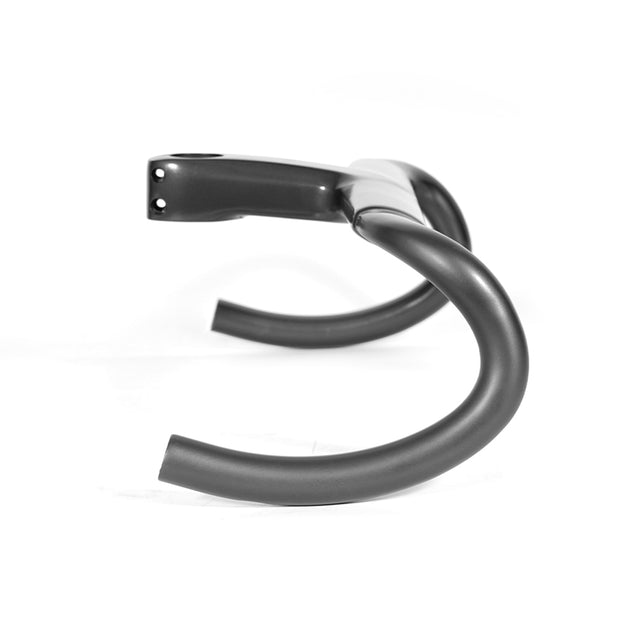
An integrated cockpit eliminates the first of those joints because handlebar and stem are a single piece. The usual advantages credited to it are aerodynamics and looks, but there is another, less talked about: it is one less carbon interface to tighten, align and keep an eye on. In our article on the CarboX17 integrated handlebar we explain why that joint is structurally unnecessary, and if you are deciding on sizing, you will find the guide to handlebar width and stem length useful.
| Feature | Detail |
|---|---|
| Construction | Handlebar and stem integrated in a single piece |
| Material | T1000-grade carbon fibre |
| Sizes | 380 / 400 / 420 mm |
| Weight | Approx. 328 g (size 400) |
| Cable routing | Compatible with internal and semi-internal |
| Accessories | Bike computer mount (Garmin / Wahoo / Bryton) |
| Includes | Spacers, stem covers and compatible hardware |
Whatever the part's manufacturer specifies, printed on the clamp itself or in its manual. In cycling these are low, single-digit values in Nm, and they should not be estimated or copied from another component.
It is not recommended. Your hand cannot tell 5 Nm from 9 Nm, and that difference is enough to deform or delaminate a tube. A torque wrench costs far less than the component it protects.
It contains microparticles that increase friction between surfaces. By gripping better, it lets you clamp with less torque, which is exactly what protects the material. Apply a thin layer; it is not an adhesive.
Not on the carbon interface. Grease reduces friction, the part tends to rotate and that pushes you to overtighten. Save grease for the bolt threads if the manufacturer says so.
Whitish marks next to the edge of the clamp, a dull sound when you tap the area, a permanent clamp imprint or creaks that always come back to the same spot. If you see any of them, have it checked before riding.
It is worth checking the torque after the first rides, because the surfaces bed in. Checking does not mean adding turns: it means verifying with the wrench at the specified value.
Carbon is not fragile: it is demanding about how it is asked to work. It takes the loads it was laid up for without breaking a sweat and suffers when we crush it at a point nobody designed it for. That is why mounting is not a formality that comes after buying a good part: it is part of the part.
Clean surfaces, assembly paste, a torque wrench and progressive tightening. Four five-minute habits that separate a cockpit that lasts for years from one that cracks in silence.
Want a cockpit with one less joint to worry about? Discover the CarboX17 integrated handlebar: handlebar and stem in a single piece of T1000-grade carbon, with spacers, covers and hardware included.
Topics